Tips of Initial set up
Hard
Tips of Initial set up
supplementary information of opeation manual.
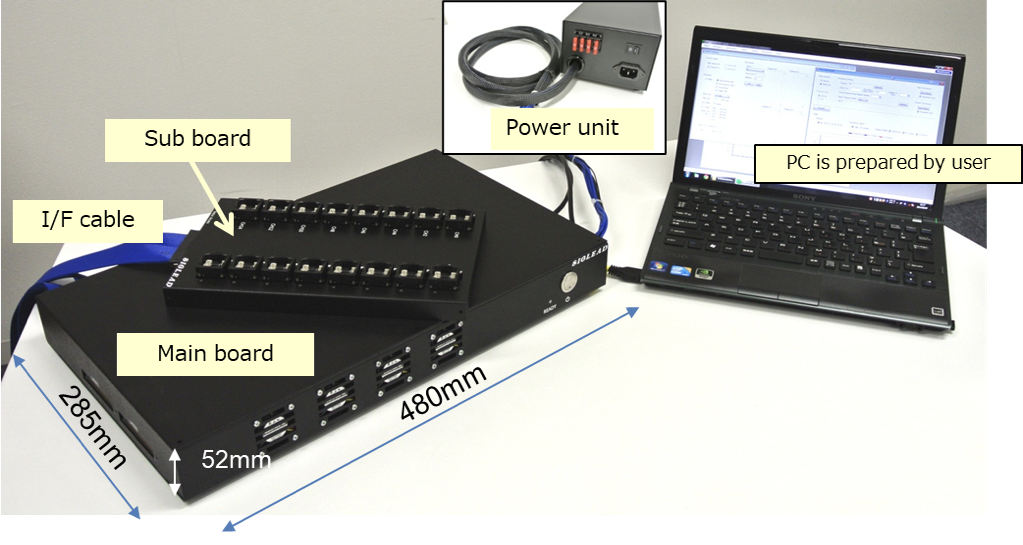
Deliverbles from Siglead
- Main board
- Sub/Scocket board
- I/f cable (1m standard)
- Power supply unit (AC90~264V)
- Application software
- Operation manual
Prepared by Customer
- PC
- Multi core/thread CPU is recommended to prevent processing spped drop if multi subboard configuration.
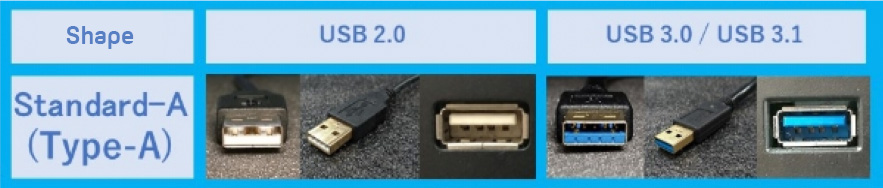
- USB Cable
- USB2.0 or 3.0 Type B
Main board Power ON
All LEDs turn on Green after Hardware intialisation is completed.
If there is a problem, the light will be yellow or no light. Please contact to Siglead in such a case.
Abnormal status

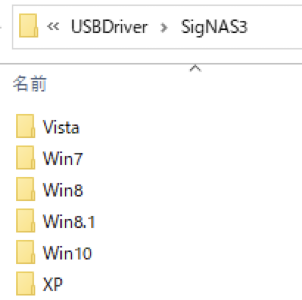
PC setup
Refer to another sheet if the installation of USB Driver is still not installed
USB cable connection ( PC to Main board)
connection start

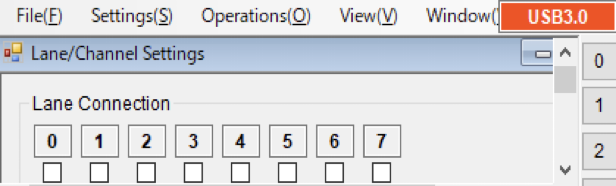
"USB2.0" or "USB3.0" is indicated on right up of GUI if connection is completed
If it does not succeed, turn off the main board once, unplug and insert the connector, turn it on
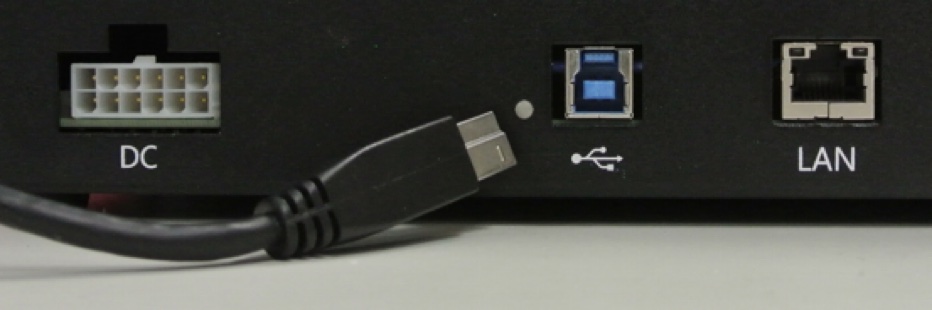
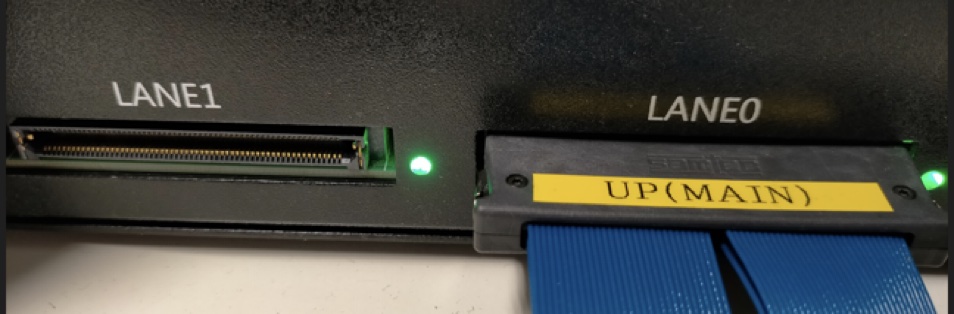
I/F cable connection ( Main board side)
The cable connector is labeled, so be careful not to confuse the top and bottom.
And, there is a risk of bending the connector pins when unplugging in the wrong way. Please be careful.
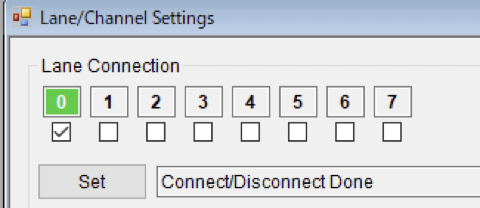
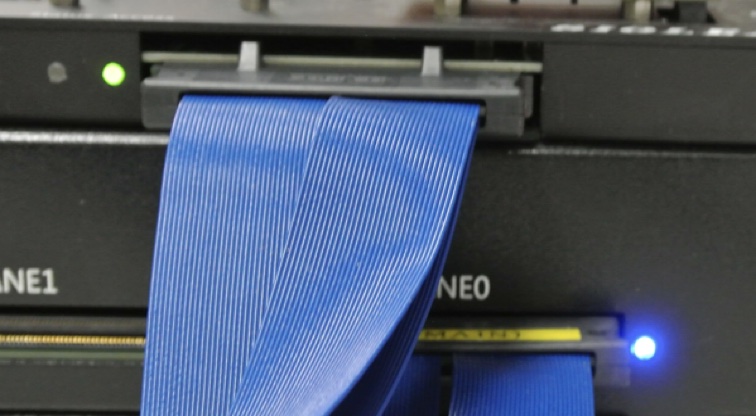
LANE connection ( Main board to Sub board)
The figure below shows an example of a successful connection.
In that case, the LED color of the Main board is Blue and the Sub board is Green.
If the message or LED color is different from the one shown below, turn off the power and recheck the connections.
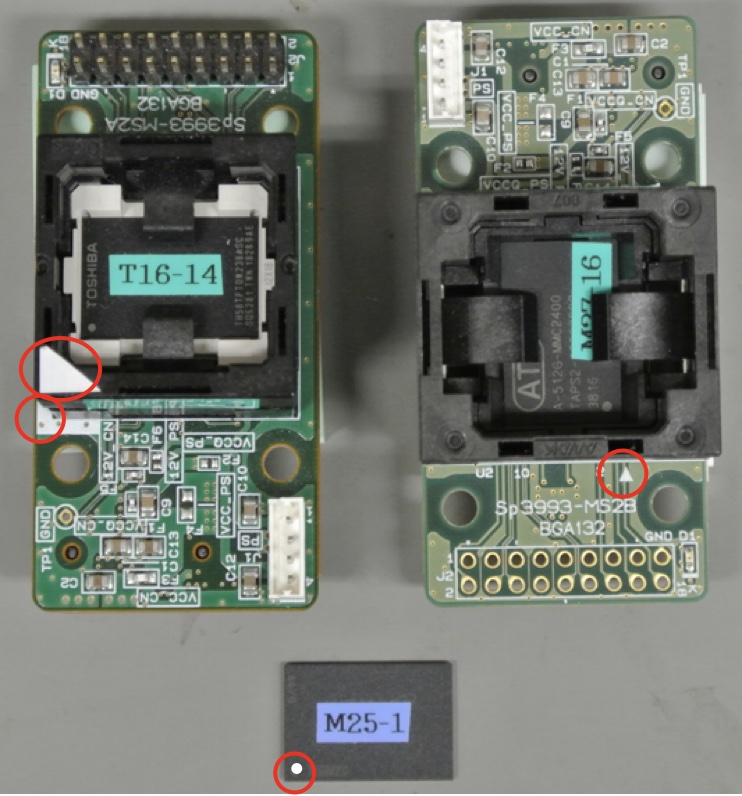
NAND Flash Memory setting into Socket
Set the mark on the Memory Chip to match the mark on the socket board.
If you set it by mistake and turn on the power, it may generate high heat and damage the memory chip.
Vccq (I/O logic power voltage
Current setting can be confirmed in General Setting of GUI.
Please make sure that it matches the specifications of the memory of DUT.
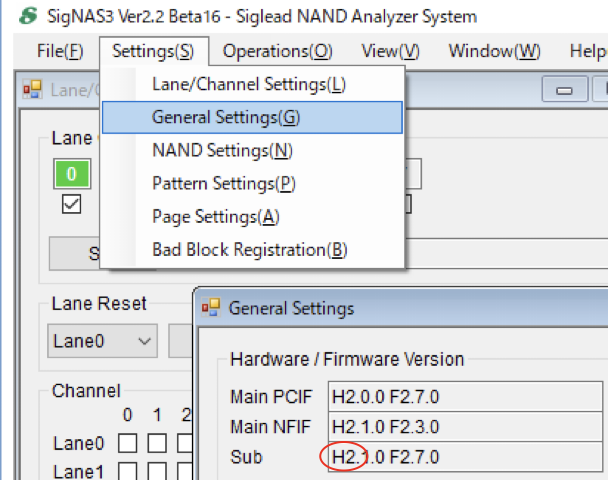
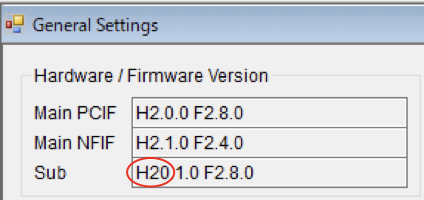
It supports 1.8V for one digit and 1.2V for two digits.
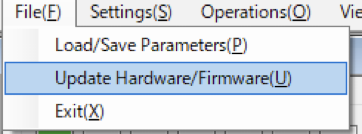
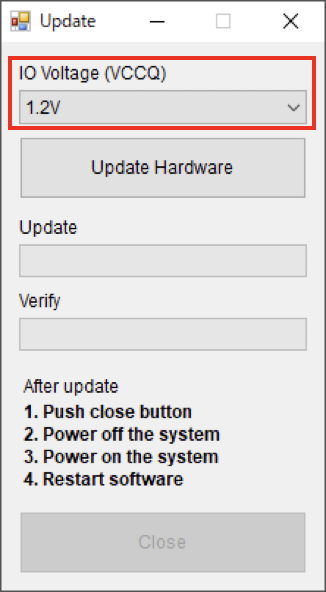
Changing Vccq is by setting the voltage selection when updating the firmware.
Software・Driver
Connect PC and SigNAS3 main board with USB cable and start SigNAS3 software.
If the message below is displayed and SigNAS3 cannot be found ...
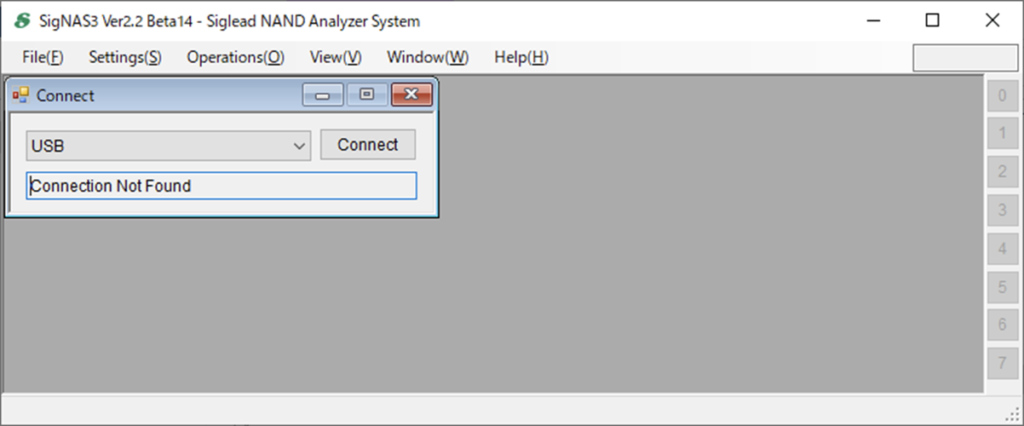
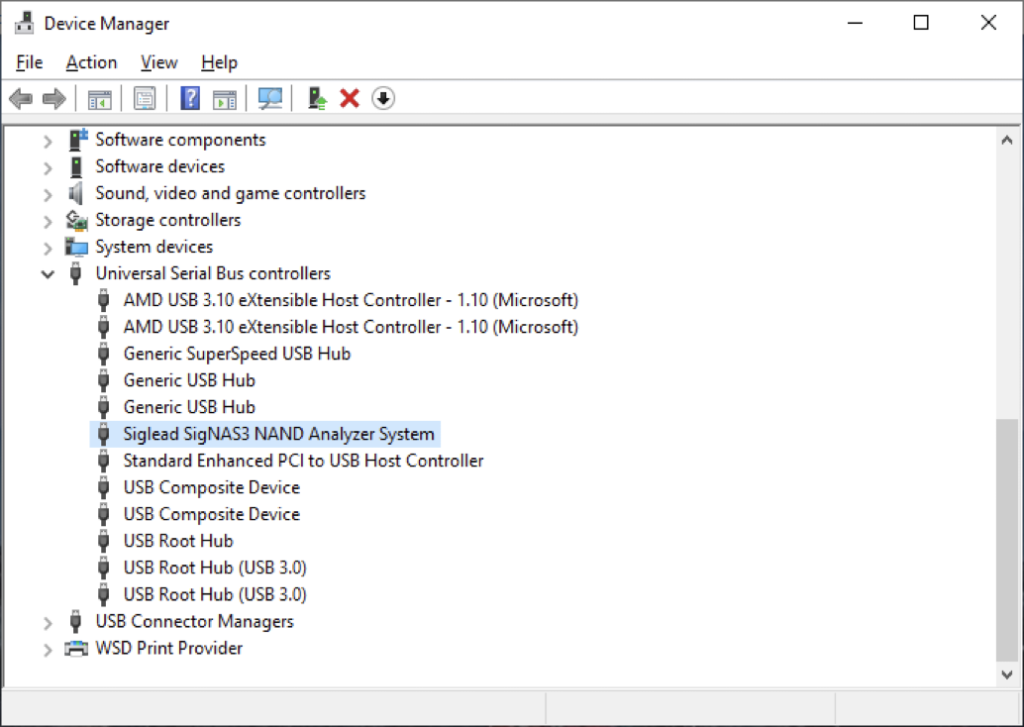
Check the device manager of your PC.
Show USB (Universal Serial Bus Controller) and confirm SigNAS3 is present.
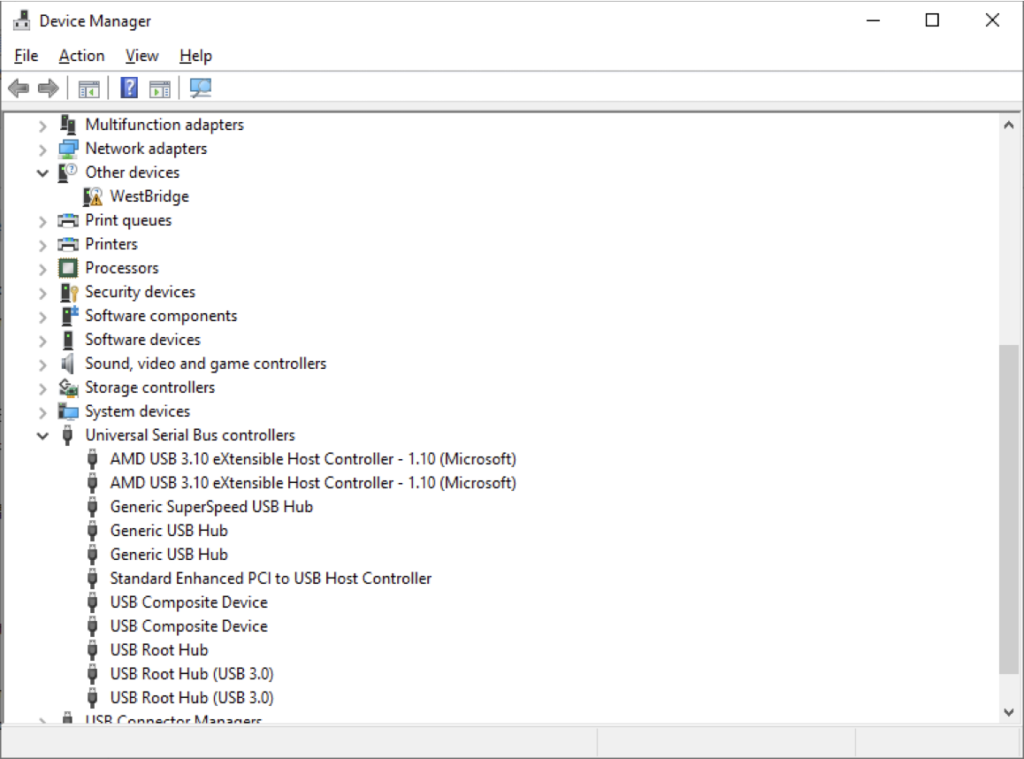
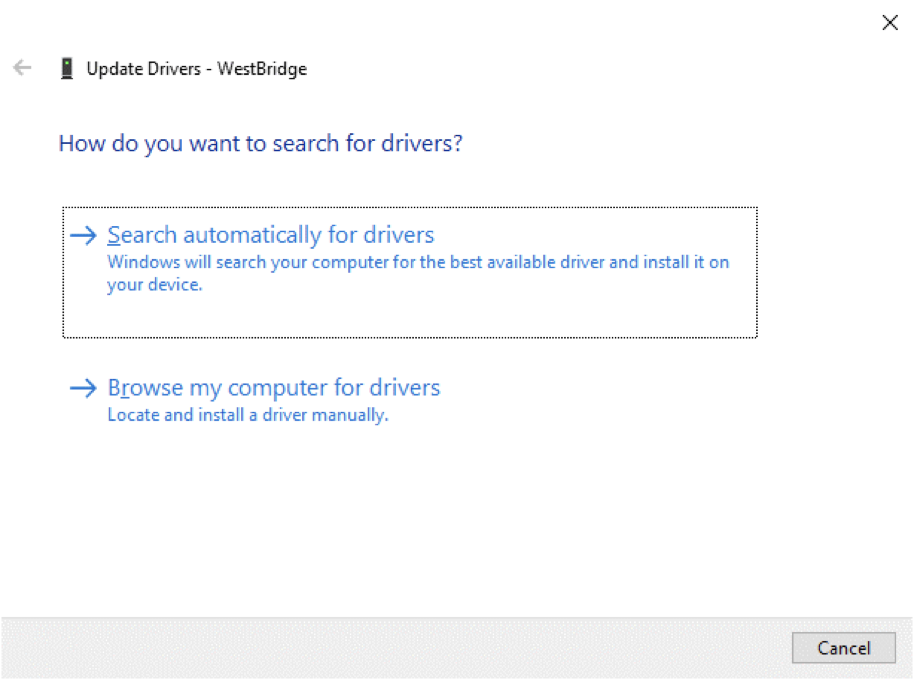
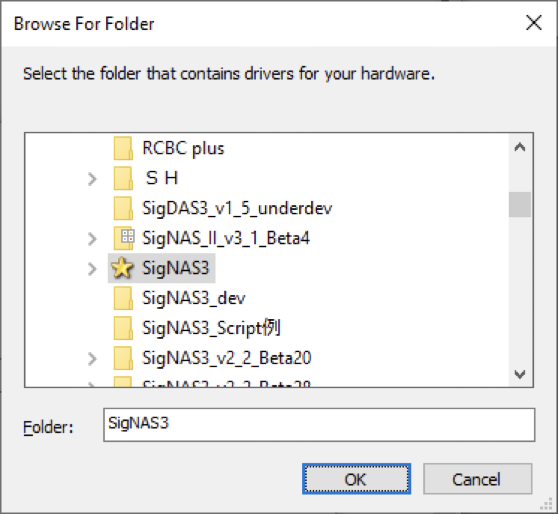
If SigNAS3 is in an unknown state as shown above, please follow the instructions below to install (update) the USB driver for the unknown device.
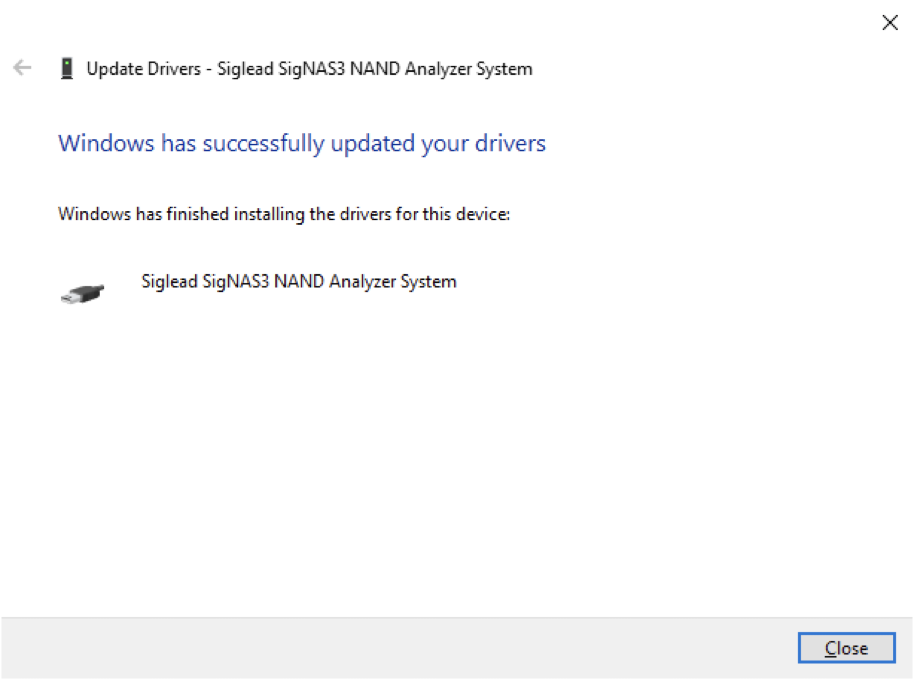
If USB driver update is completed successfully, SigNAS3 will be displayed as shown below.
Run the SigNAS3 analysis software again and try to connect via USB
Start Connection

Display "USB 2.0" or "USB3.0" in the upper right of the GUI screen if success.